| |
| Articles |
Tutorials
| To-Scale Switches and Slips (part.1), by Dr. Norbert Aust (Switchdoc) |
| Read | Write comments: 9 |
Posted Sun May 04 2003 3:09pm |
Page:
1
2
3
4
5
6
7
8
|
... and here we go (finally) ...
1) Laying traffic bearing tracks
As you may have realised, I had some difficulty giving names to this kind of track, that we place first. Now let us see what is meant.
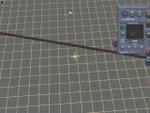
Fig.01 shows the first track that is placed on the ground and - if we are doing our layout to model a railwayline existing in reality - aligned to the measurements of a map. This one here will be the mainline leading through the station.

fig.01
North to it we want a second mainline track bearing the traffic in the opposing direction, spaced 4 m from the first (as is standard in central European railways). Then we will place the next one spaced 5 meters, in this siding freight trains are to wait while faster trains are passing. It is set with some increased spacing to allow railwaymen to inspect the consist without too much risk of accidents. To the south of the first track we will place a siding for loading, spaced 8 meters from the first for safety reasons as well.
Some remark on spacing the tracks:
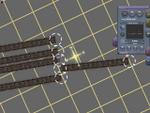
To my experience it is accurate enough to adjust track spacings using the circles indicating the splinepoints. I guess nobody operating a Trainz map does so with a ruler or a yardstick in hand. Fig.02 shows the different positions:
 fig.02 fig.02
- 4 meters: circle of splinepoint just so does not touch the rail of the neighboring track
- 5 meters: circles of splinepoints of two neighboring tracks merge
- 8 meters: spacing by auxiliary piece of track, circles touches both rails
(without picture: 9 meters: auxiliary circle clearing rail on one side, merging with circle on the other, 10 meters: merging circles on both sides of auxiliary track).
|
|
|
|

