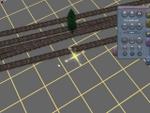
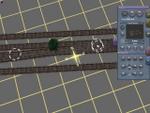
After removal of the rulers the pine placed first looks like that (Fig.10). Now we introduce new splinepoints to those locations, where we want the arc that is to be the branch to start and to end. And we place an additional splinepoint in the maintrack as well.
fig.10
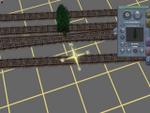
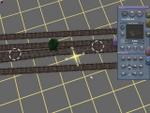
For that puspose - at least at the beginning - it is a good idea to check, if the tracks move when placing the splinepoints. For that purpose we move the pine to exactly indicate one of the intersecttion points of the rails. (Fig.11) If there would be some movement in the tracks, we will realize this by the position of the intersection.
fig.11
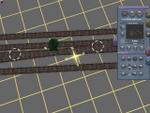
Because of the types of switches selected where the arc ends near to the frog, the arc will lead from the intersection point furthest out to the left to the one furthest out on the right. That is why we place the new splinepoints at these intersections, one in the traffic one in the connecting track. (Fig.12)
fig.12
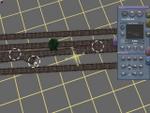
Now we place a new trackpiece between those new splinepoints, attaching it tto the left (Fig.13) and connecting it to the right splinepoint (Fig.14, Fig.15).