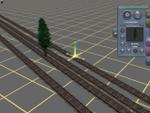
First you mark a starting point for the connection (Fig.04). For this purpose I use pinetrees with high stem. The stem is small enough in diameter to allow accurate enough placing and indicating. The footpoint can be observed from steep an angle from top. And the tree is very well visible from any distance we need.
fig.04
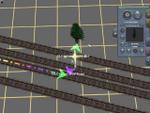
Starting with the first pinetree we place a ruler of 120 meters along the track - or any other length that is easily devided by 12 (Fig.05). For the sake of clarity in this tut here I used 180 meters, because then the second marking is outside of the tracks.
fig.05
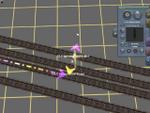
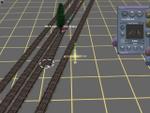
Starting with the endpoint of the first ruler, we place another one with 1/12 of the length of the first one taking a direction perpendicular to the track. Here we have 180 / 12 = 15 meters (Fig.06) We place another marker to the end of the second ruler (Fig.07). Note: with all of this precision by eyesight is absolutely sufficient. You do not have to take measurements of the 90 degree angle for instance. Judge with your eye.
fig.06 and�fig.07
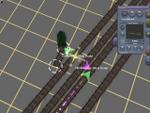
Now we place the connecting track putting the first splinepoint around the stem of our second marking (Fig.08) and pull the trackpiece back to our first marker, but pull it further than that and align (by eyesight !) this connecting track in that way, that the rails intersect near our first marking tree. Thats it.