| |
| Articles |
Tutorials
| Displacement Tool, by Fizz |
| Read | Write comments: 13 |
Posted Mon Feb 25 2002 10:15pm |
Page:
1
2
3
4
5
|
Here's what I discovered so far
The base tile has to be square, 256x256 or 512x512 or 1024x1024 for this to work.
To start on your first one it's easier if you load up the sample tile and paint over it. I tried overlaying a grey topographical map over it and I couldn't get that to work, so I drew one (fig.08).
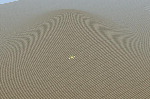
fig.08
EUREKA... it worked. The results were a little rough so I softened the tile with a bit of blur (fig.09). The idea is to get a smooth transition between the shades.
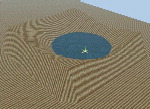
fig.09
The lighter the shade the higher the hill. Black or dark grey with a value less than 128,128,128 will etch a line below grade. On these 256x256 tiles the minimum pixel width for a strong trench is 3 to 5 pixels. That's the width of the narrowest river in the finished image.
Don't forget, this will vary with the pixel width you chose and on how much area you cover when stretching the tile over your layout. These were done over a full board with an image of 256x256 pixels.
(I have since found out from reading old forum entries that it's possible to overlay topo maps. The learning curve just got steeper. Something I have to work on. Thank you Drucifer)
|
|
|
|

